Creating the directory and a subdirectory
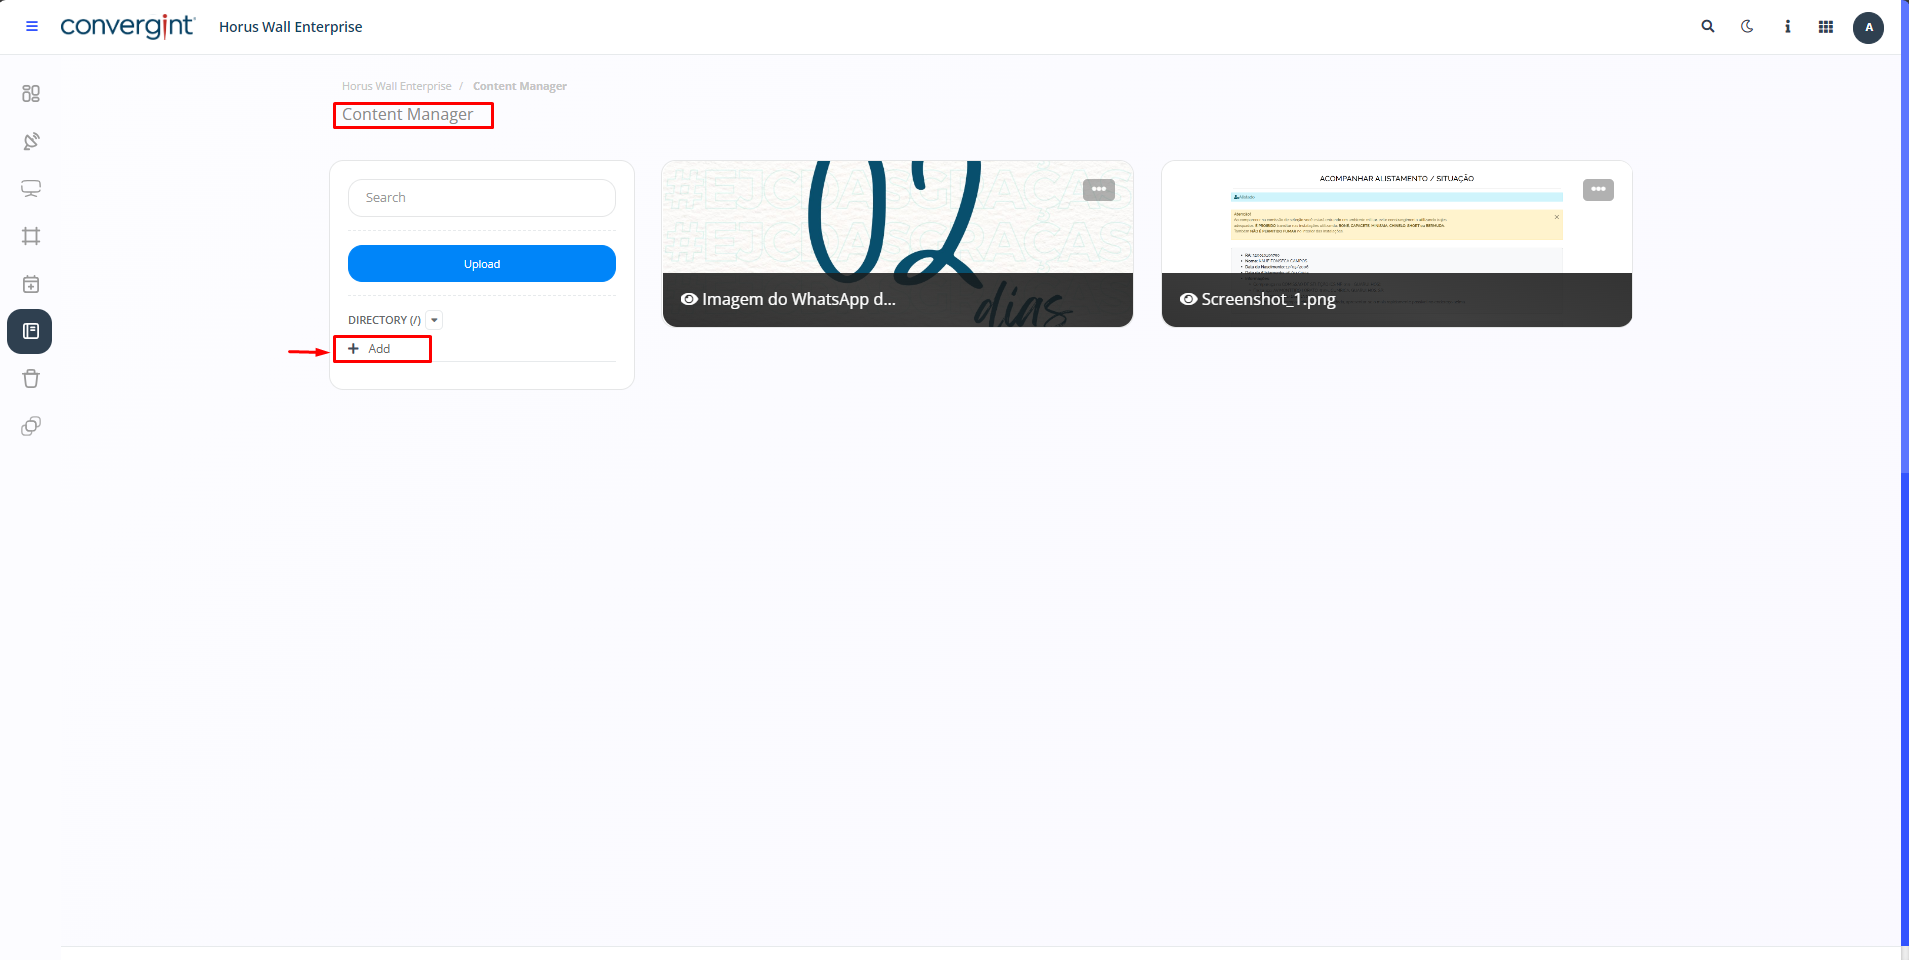
The first step in creating a Directory and a Subdirectory is to access the “Contents” tab. Within this tab you will find functions that allow you to manage media files, such as images and videos, thus facilitating the process of creating Horus Wall Enterprise Slides.

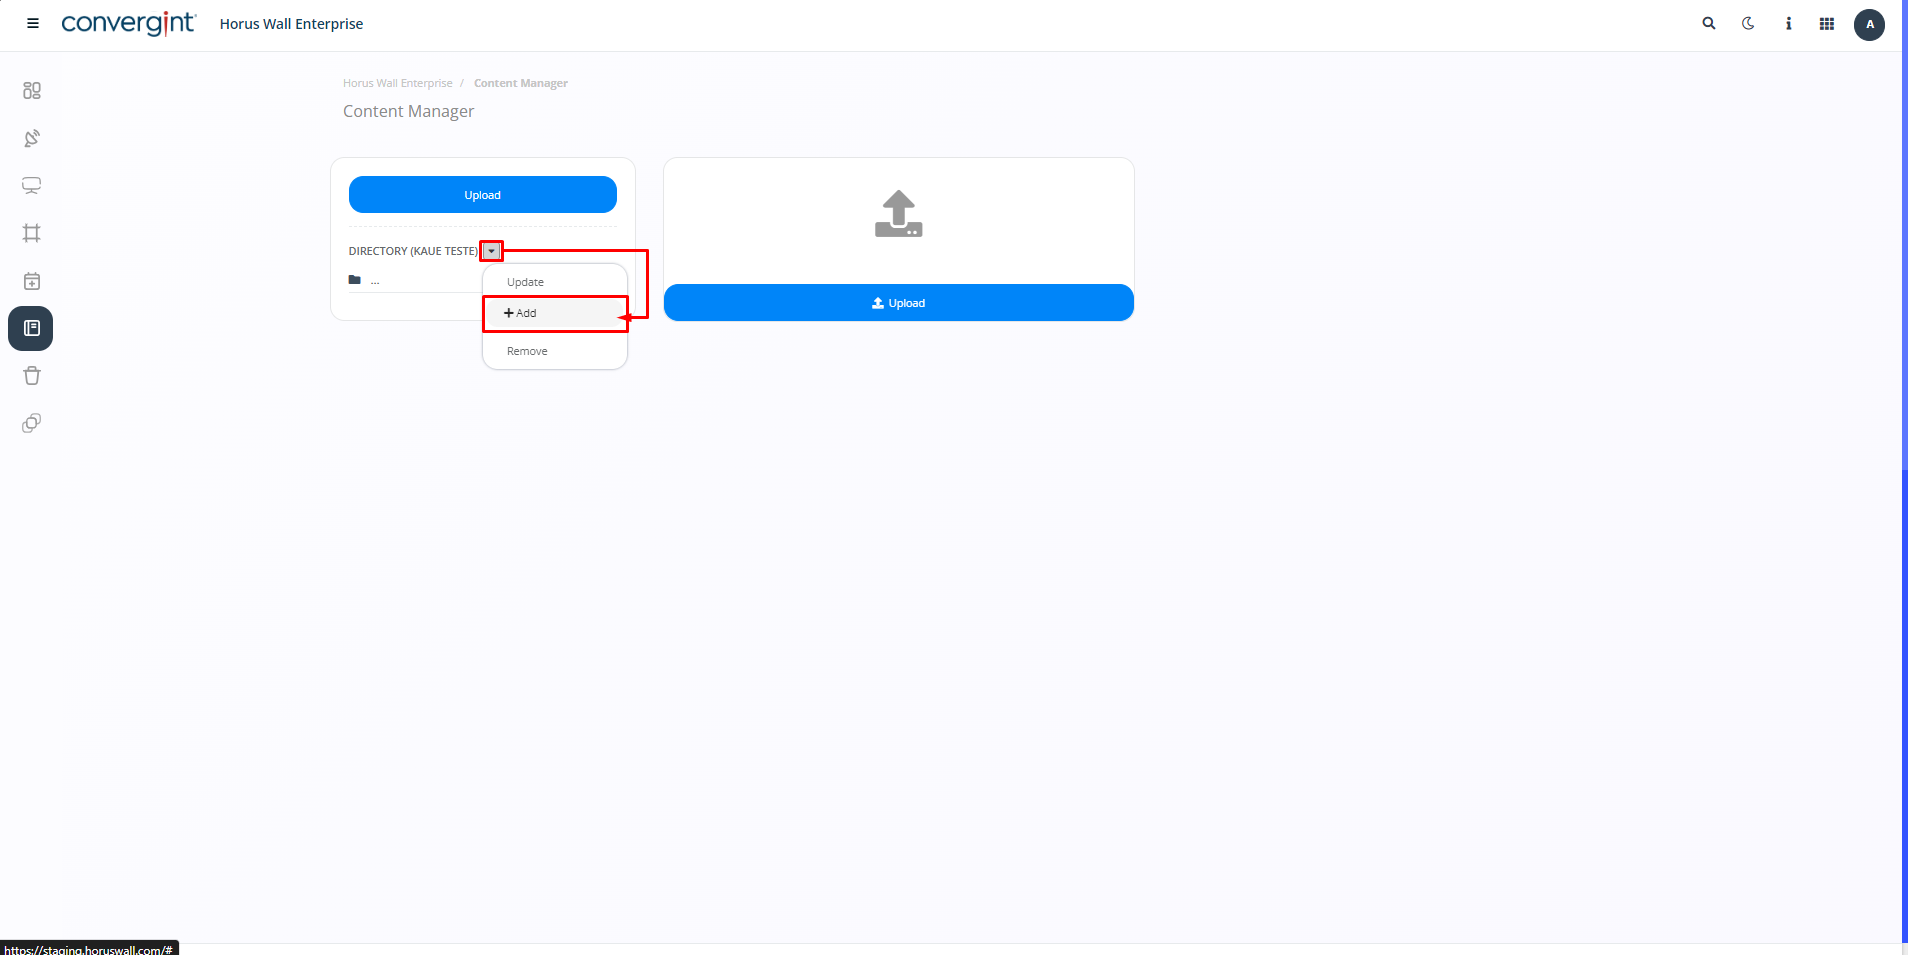
After following the previous steps, click on “Add” inside the directory and choose the desired name in the Content Manager tab. This feature allows you to store the downloaded file in a specific location, making it easier to organize and subsequently add files to the Slides, which will be inside the directory.
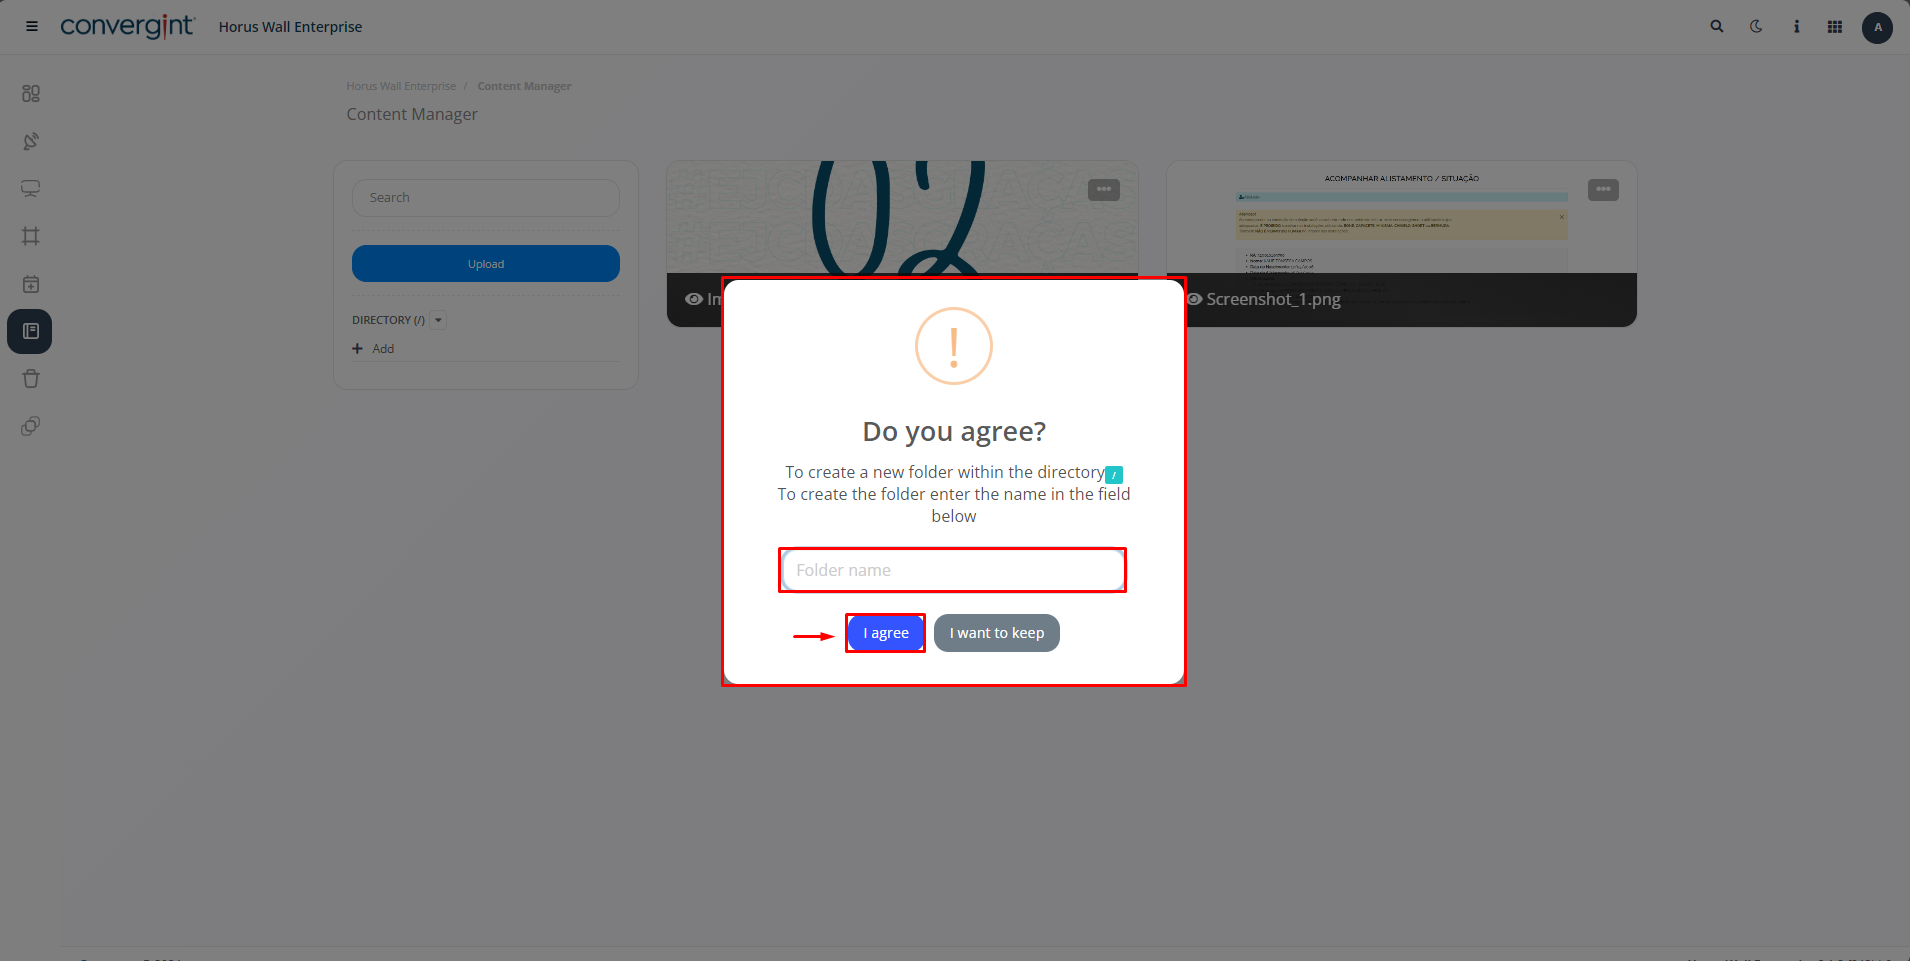
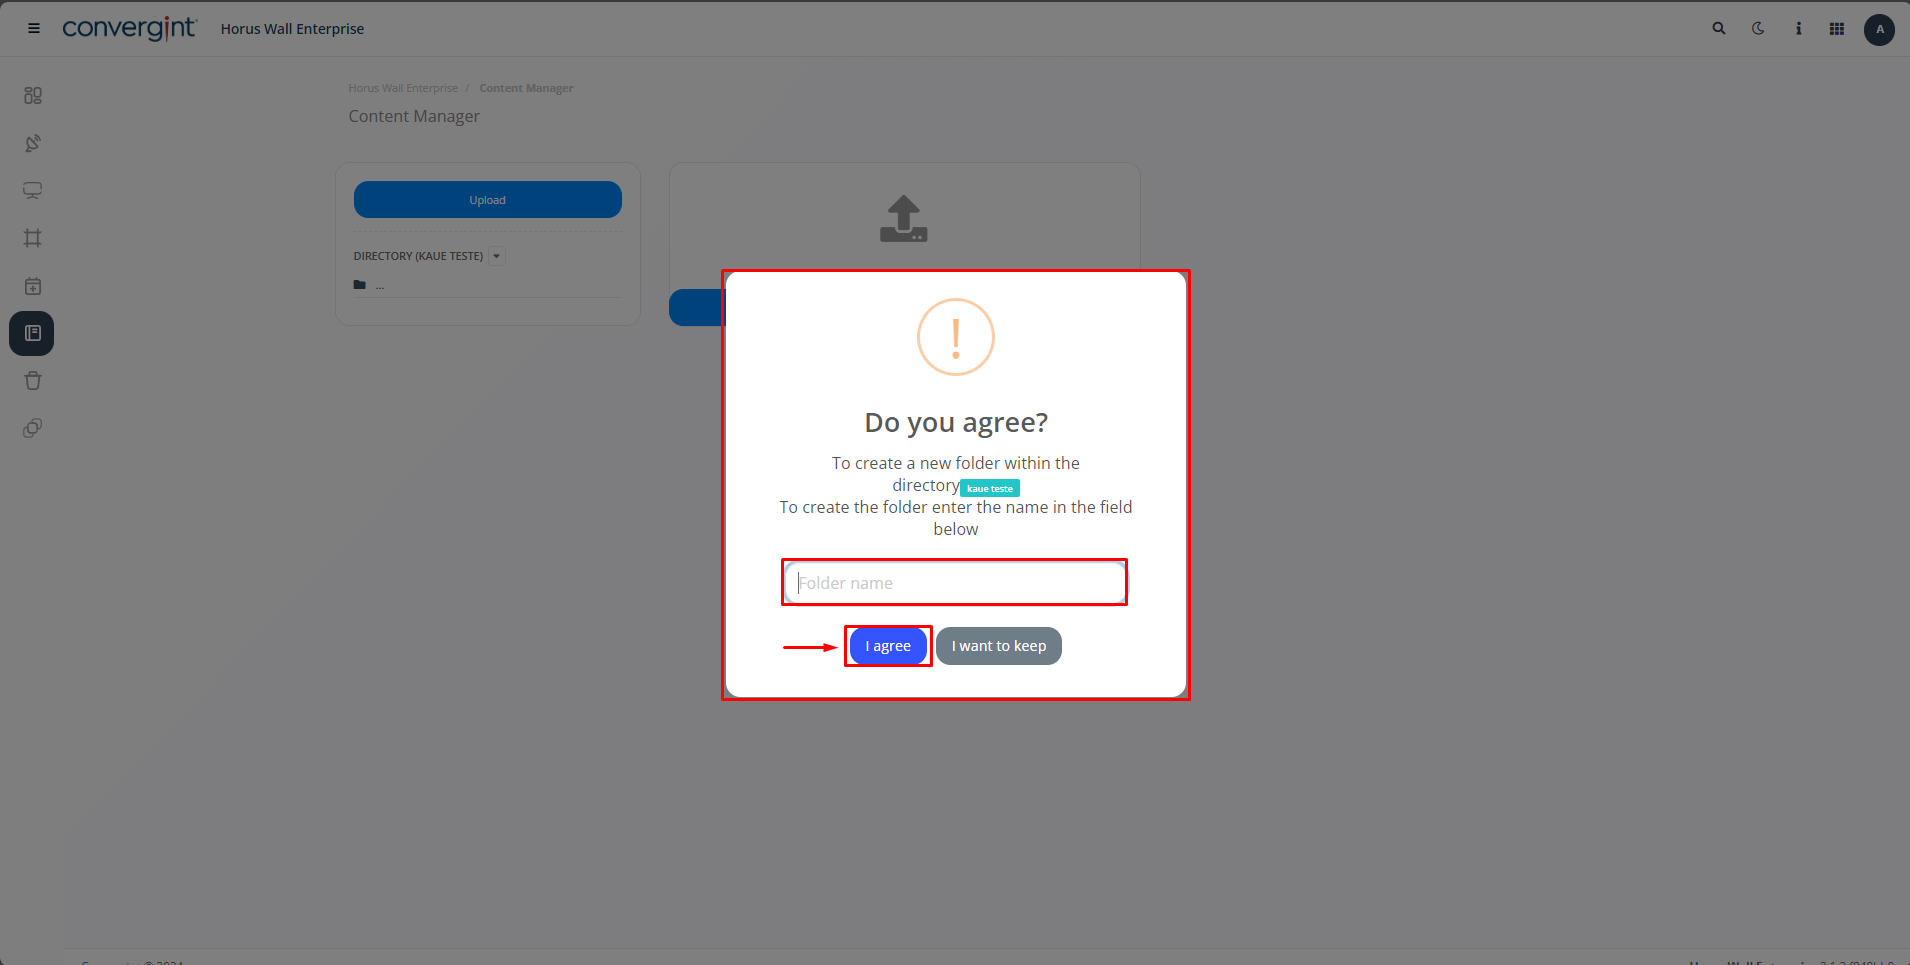
After clicking on “+Add”, a pop-up will appear asking you to enter a name for the Directory so that it can be created. Once you have entered a name, click “I Agree” to confirm.
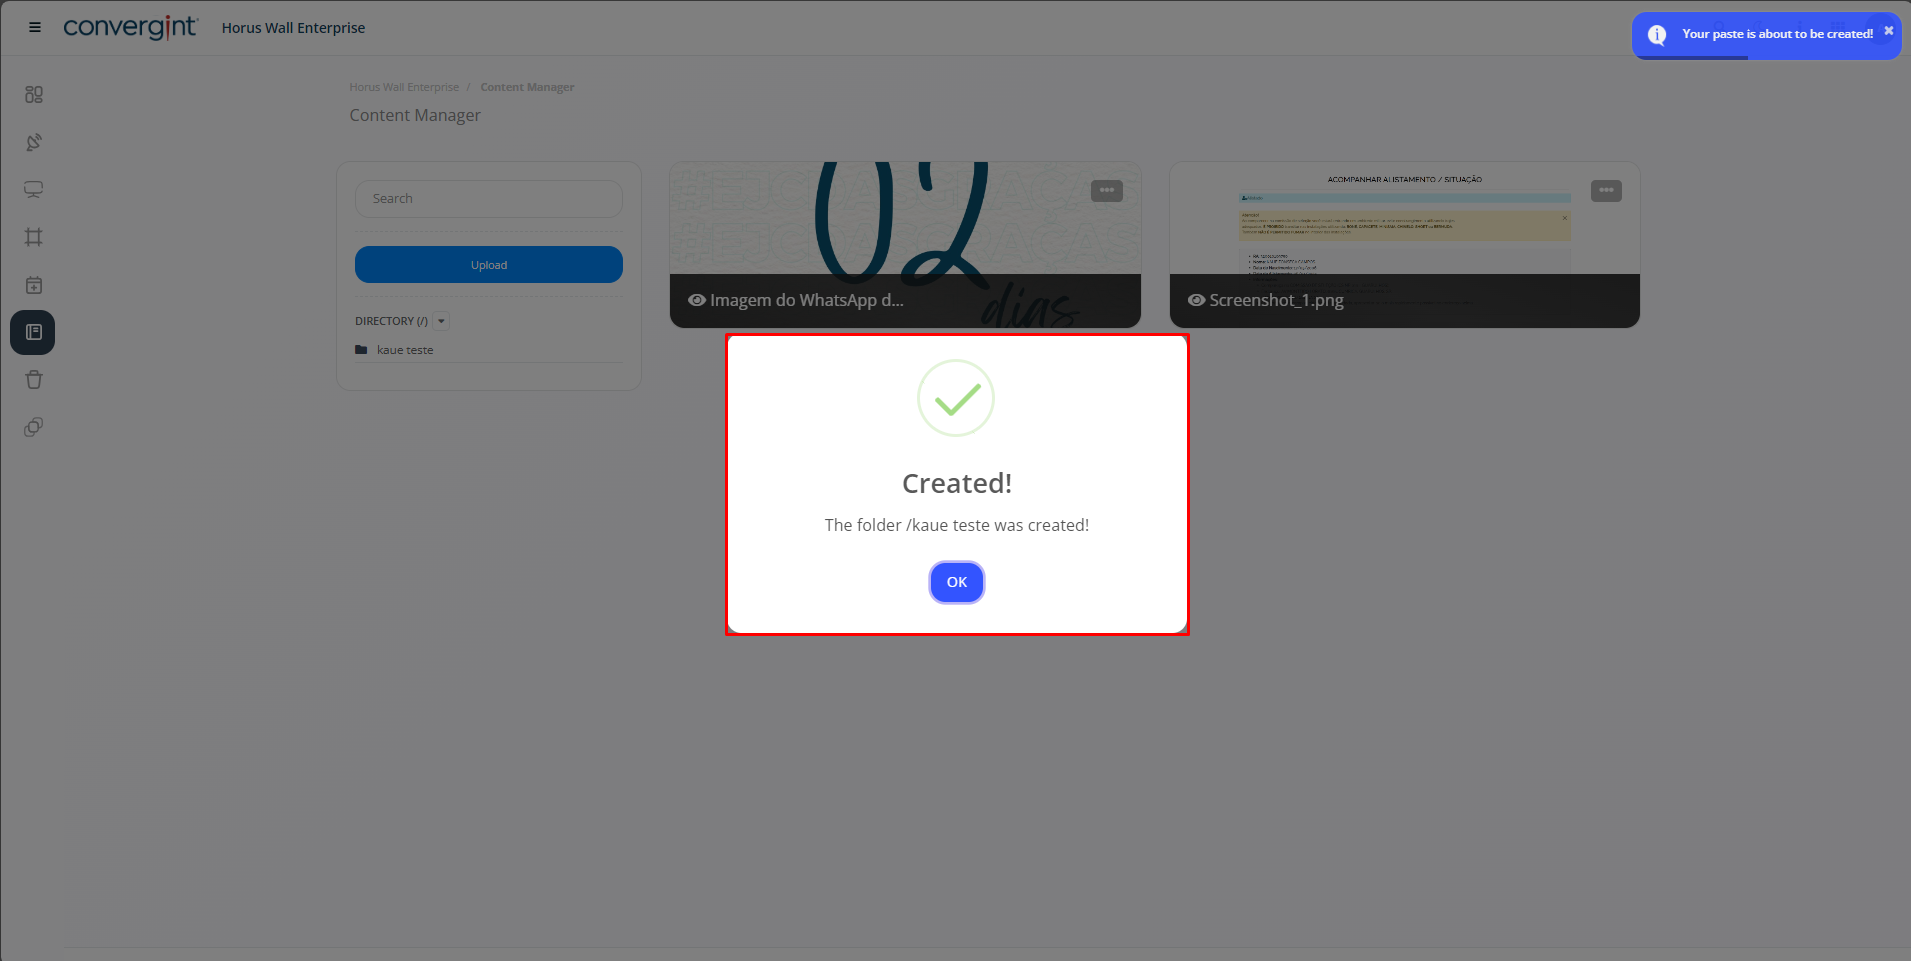
After carrying out the above steps, the Directory will be created.
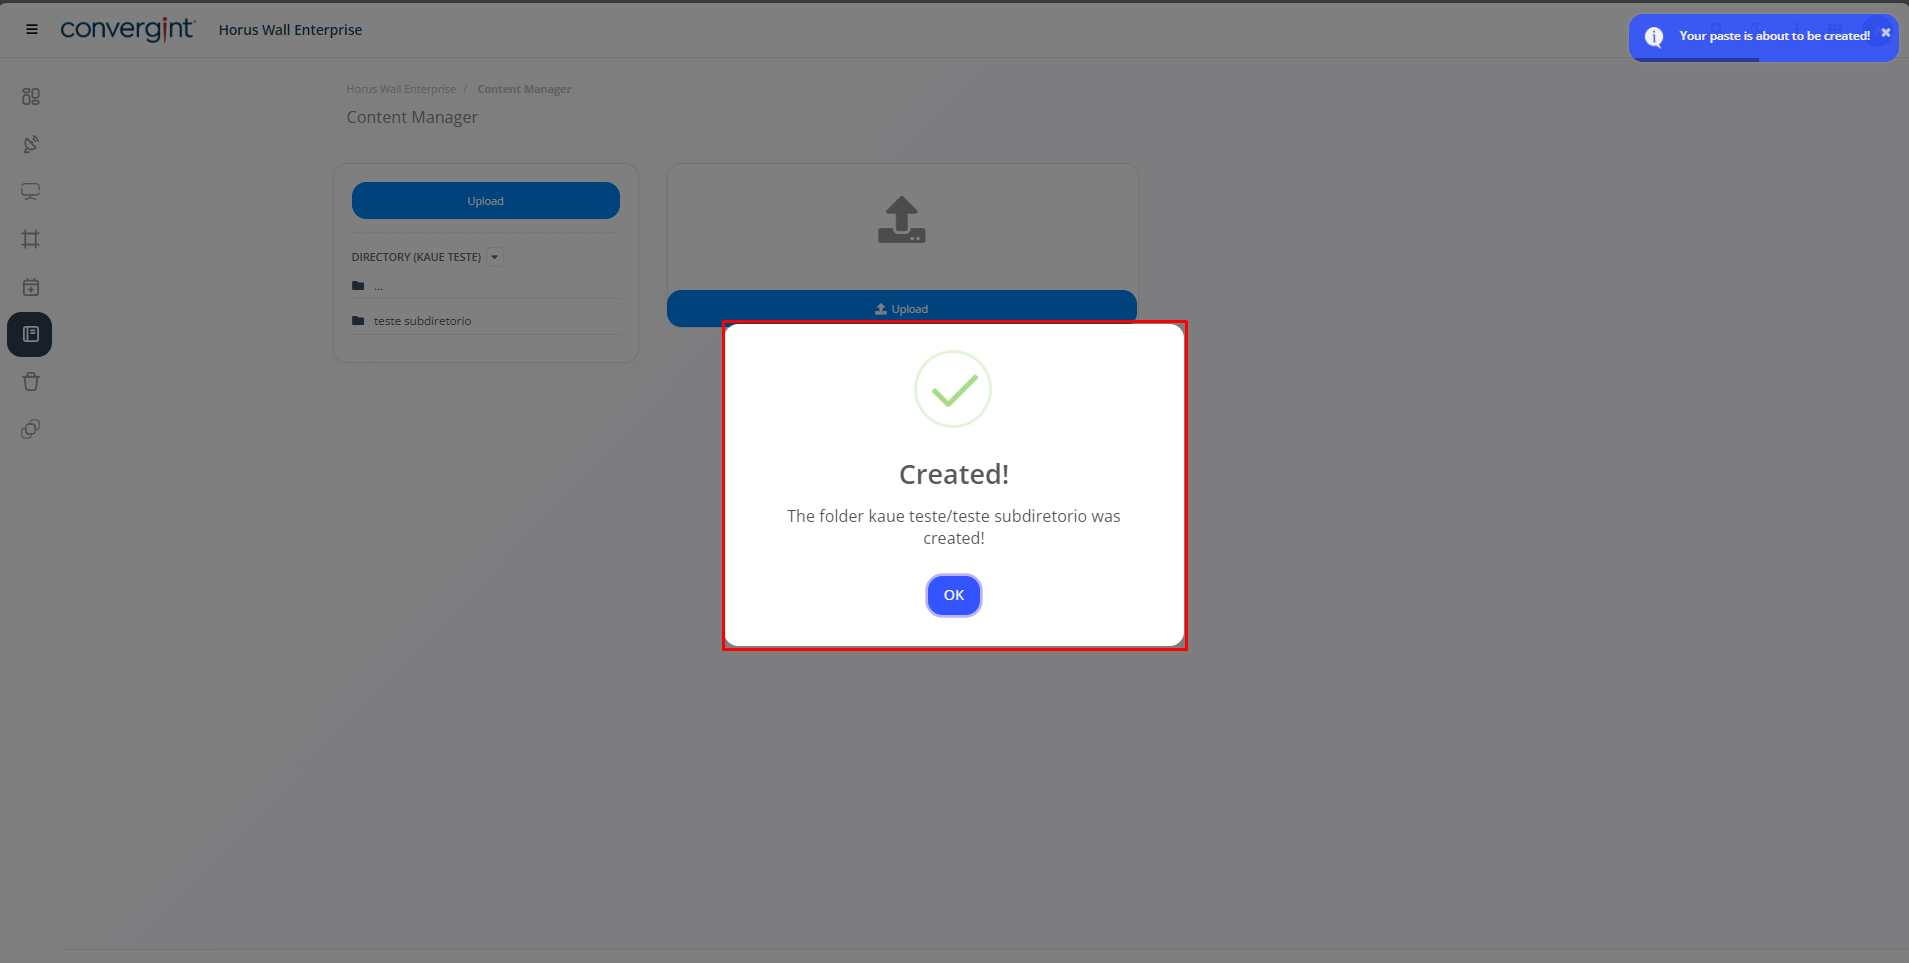
To create a subdirectory, you need to access the previously created directory and then click on “Add” to create the subdirectory. This function allows you to create a directory within another directory, which is why it is called a subdirectory.
After clicking on “+Add”, a pop-up will appear asking you to enter a name for the Subdirectory so that it can be created. Once you have entered a name, click “I Agree” to confirm.
After carrying out the above steps, the Subdirectory will be created.