Quick Tour (Editor de Layout)
-
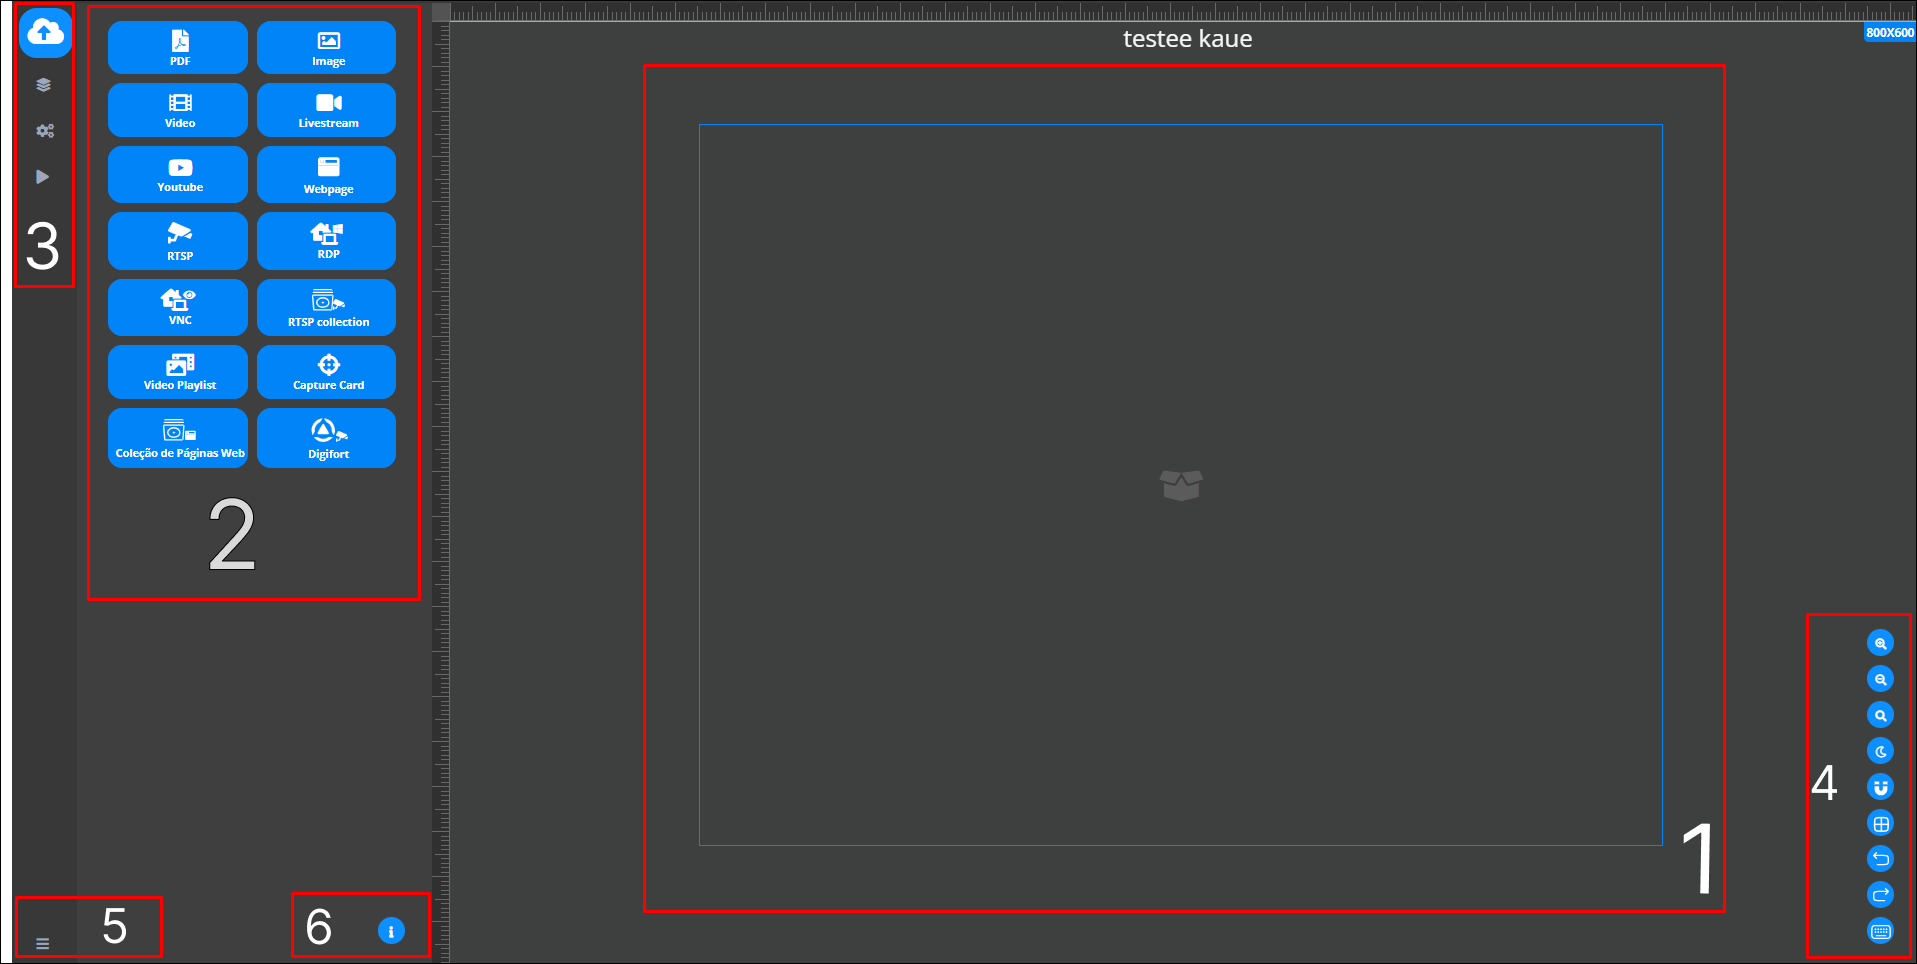
With Videowall, you can add various components to your project, which are available in the editor located on the right-hand side of the screen. Among the options available, you can insert files such as PDFs, images, videos, livestreams, YouTube content and more.
-
The Components section refers to the elements you want to add to your layout. Everything you select in this section will be incorporated into your videowall. Among the various components available are options such as: PDF, images, videos, YouTube, VNC, RTSP Collection, among others. In other words, all the items in this section are elements that you can include in your layout according to your needs.
-
3.1 Through the Save section, you can record the saving of all the changes made within this editor.
3.2 In the Layers topic, you can add several layers, which are identified as “New Group”. All the elements included in your videowall can be viewed within this component, making it easier to organize and manage the layers created.
3.3 The Settings function displays the option to select a name and enter the desired description, according to your preference.
-
In the Interface Controls, you can adjust the theme of the system interface, allowing you to switch between light or dark modes according to your preference. In addition, there are options for zooming in, zooming out, and setting up a customized grid layout. The “back” functionality is also available, as is the option of shortcuts. These are just a few of the many features that can be adjusted in the interface controls, allowing you to customize the experience to your needs.
-
The Menu has the function of allowing you to return to the tabs available in Horus Wall Enterprise. In addition, it offers the option to “Exit”, making it possible to log out of the system and end the user's current session.
-
The Information icon is used to display detailed information within the editor. It provides an overview of all the data related to the editor, making the process more explanatory by presenting the details of each component included, making it easier to understand and manage the elements in the project.
Observation: The components presented in this Quick Tour are the same as those available in the “Remote Applications” tab. Both offer the same options and functionalities for adding elements to your project, providing consistency in the use of the tools within the system.