Scheduler Inactivation
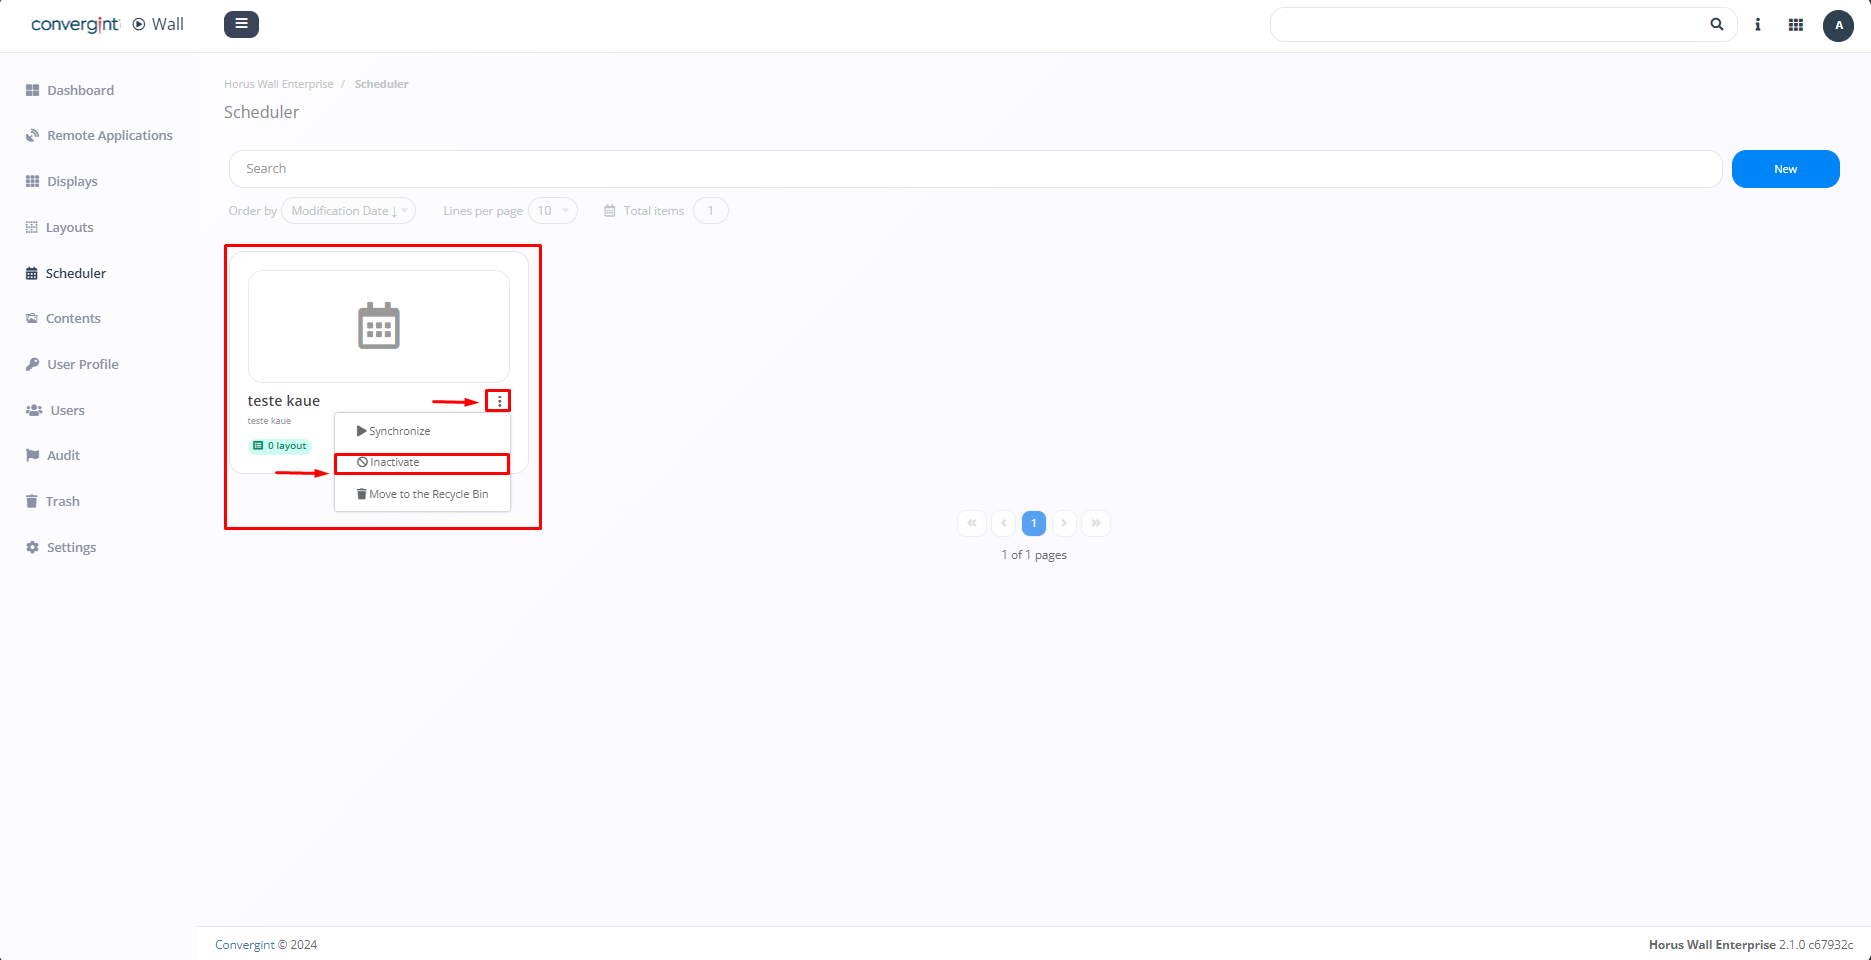
To deactivate the scheduler, you need to access the "Scheduler" tab and click on the three dots next to the scheduler you want to deactivate (highlighted). Then, click on "Inactivate."
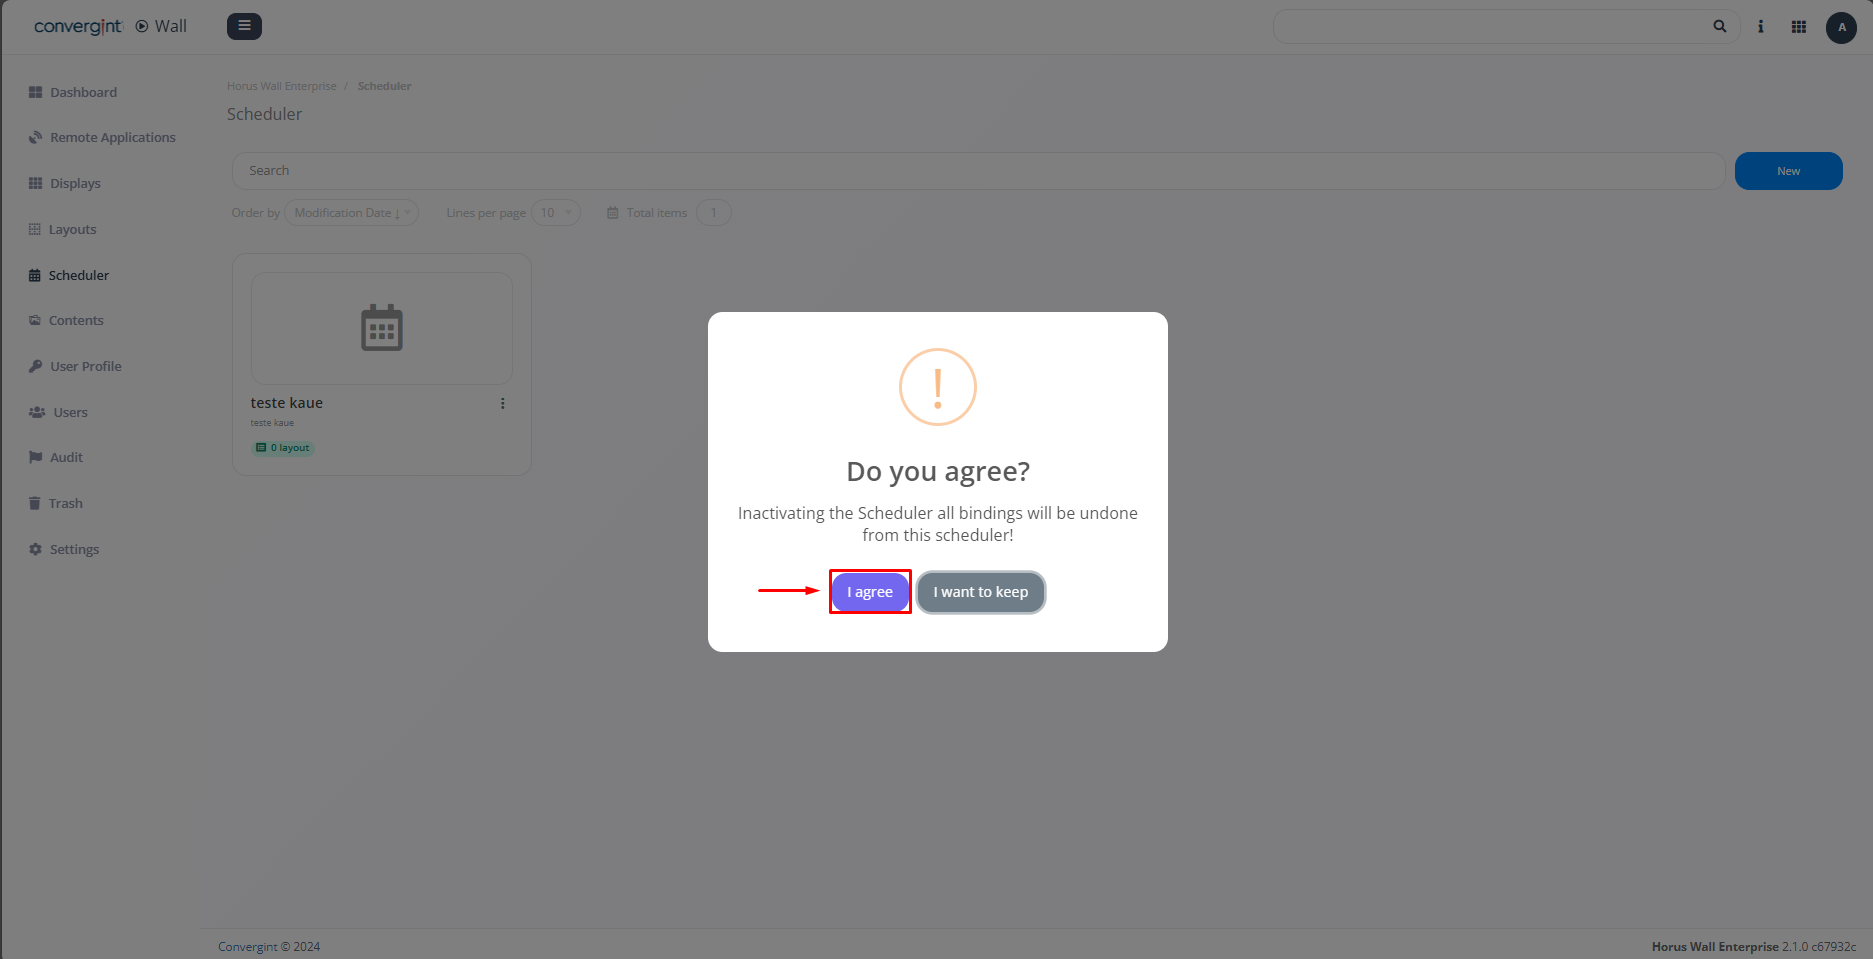
Upon selecting the option, a pop-up will appear requesting confirmation before proceeding with the deactivation of the scheduler. Then, click "I agree."
Upon clicking "I agree," the scheduler will be deactivated (highlighted).

Note: If you wish to activate the scheduler, simply follow the same procedure as done previously.